Saturday, May 16, 2015

Time to farm!

Hi! I hope you are doing well. I wanted to share a neat new book with you. It's called Farm Girl Vintage and it is by Lori Holt of Bee in my Bonnet.


I love this book! The blocks are really cute and easy to make. It has instructions for 6 inch and 12 inch blocks. The instructions are very clear and easy to follow. Pit also has a lot of pictures and many other projects to make. Best of all, it has a spiral binding so it lays flat! Lori is currently hosting a sew along over on her blog if you would like to play along.
 
Here is her link: Beeinmybonnet

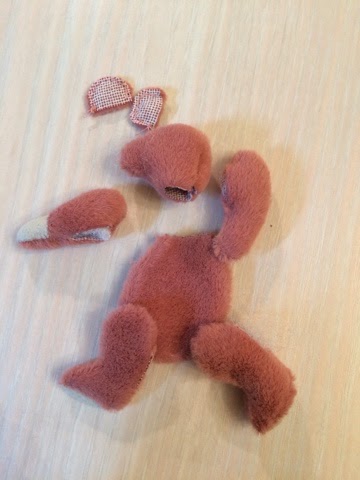
I have been following along, but of course at my own pace. One of the first projects she shared on her blog was a pincushion. I thought the construction of it was very clever and I just had to make one! Here is my finished pin cushion.
 
The top
 

The bottom
 

I bought a charm pack called Garden Project by Tim and Beck to make this. I did buy additional yardage of a few of the fabrics because I was originally going to make pot holders, which I may still do. You can see Lori Holt's pincushion tutorial here at this link:
 

I will share my farm girl vintage blocks when I get a few done. Until next time, keep sewing and have a happy day.


Thursday, March 5, 2015

Chocolates anyone?

I wanted to get a Valentine's gift for my oldest daughter. So I took a look at her etsy favorites to see what I might get. She had favored a small bear but it was sold out :(  . Hmmm I could make that (famous last words right?).  So I did!  The pattern and kit I purchased from Endinburgh Imports,
edinburgh imports. It's quite small so you need to make sure the stitches are small and tight. I used a whip stitch on mine and that worked out good. To turn the pieces I used a small stick and was very careful not to poke it through the pieces.


Here is the completed bear


Here is how I packaged it for her. She thought she was only getting a box of chocolates! She was so surprised when she opened it and more surprised when I told her I made it. 


I had to eat the biggest piece of chocolate so it would fit, it was yummy!
Hope your day's are good! Until next time, happy sewing!

Thursday, February 5, 2015

February!


We're already digging into 2015! I have been working on completing projects over the past few months. This one I am sharing with you today is a Quilt I made for one of my nephews. The pattern is by Elizabeth Hartman called The Pointy Quilt. I made the baby size, there is also an option for a larger size. Check out her website http://www.ohfransson.com

I am learning how to machine quilt and I thought this was a good one to start with. I used a simple meandering stitch. 

 
And here is the finished project!


I must say I had some difficulty sewing the feathers to the white arrow shaft. The diagonals kept throwing me off. After I don't know how many re-sews and perseverance, I finally figured it out. I know it's just me, the pattern is very well written and has very good illustrations. I love that you can download her patterns and get started right away.

 Enjoy your day! I'll post a few more things I've finished in the coming weeks. 

Friday, October 3, 2014

Giving back

This past week I worked on sewing projects for three different organizations. Beads of courage, Heads at ease and a local Hospice.

Beads of Courage is a national program that is also expanding to other countries. It is a program that gives support and strength to children with a serious illness. Each bead they receive represents a milestone in their treatment. Beads of courage bags are given to each participant to store their beads in. If you would like to help sew bags, check out their website www.beadsofcourage.org or check with your local quilt shop.


Here is what it looks like closed

The next project was a pillowcase for an organization called Heads at ease. This program was started by a Navy mom who was sending her deployed son and his friends a hug from home in the form of a pillow case. This is a great way to support are military troops. For more information, here is the website www.headsatease.net  . I made my pillow case using some fabric I picked up while I was visiting the great city of Seattle. 


My last project this week is for a local Hospice House called Peppi's House. It's a home-like inpatient hospice facility. Each patient gets a quilt to help them feel more comfortable and more at home. Check with your local quilt shop or hospice house in your area for more information on donating a quilt. I used bright cheery colors in this quilt.

It's been a busy and rewarding week! That's it for this post. Have a great day!

Monday, September 22, 2014

Western pincushions! Yee haw!

Every year I go to a sewing camp held by the Quilters Market at the famous Tanque Verde Ranch here in Tucson, Az. I enjoy presenting our camp counselors with a new pincushion every year. This year I decided to use wool in my project. I wanted it to be a memento of camp this year and used some icons typical to the southwest and ranch living. I also added some decorative stitching and made a crazy quilt layout on the pincushions.


Since I was making two, I changed the second one up just a little bit by adding a flower instead of the horseshoe.


I filled them with crushed walnut shells that I bought from the local pet store. I love the added weight it gives them and the texture from the walnut shells help keep needles clean. I am currently working on another wool pincushion, I will post that as soon as I am done with it. But if you haven't figured me out yet, I like to work on multiple projects at once so in time it will be done. Have a great day!!

Tuesday, September 16, 2014

A resting spot


Hi all!!
I saw these neat phone / tablet holders on Pinterest. Ooooo I want one!! So I looked into purchasing one and after seeing the price I thought "I can make that!". So I scoured the internet for a pattern and after seeing how much that cost I thought hmmmm "do I really want to spend that much on a pattern". I'm sure we have all been there. After more searching I found a free pattern. Yay!! I got to work on it right away. I wanted to use it with my phone, but it came out much bigger than I thought it would. It works great with my mini iPad though.


I'm not crazy about the large pillow in front but you can still view the screen just fine. Back to the drawing board. This time I measured my phone and figured out how big I wanted my phone stand to be and came of with this version.


Much better huh?! I also filled it with crushed walnut shells and a bit of polyester stuffing to keep the shape of the point. I do like this version much better, in fact, I have had a few request for some, so I will whip up a few more. That's it for today. Have a happy day!

Sunday, September 7, 2014

It's Halloween!

Disney has declared it Halloween season with the start of their Mickey's scary Halloween parties. Sooo... I thought it would be fun to make some Halloween themed pillow cases! My Daughter is currently in the Disney College Program Internship and is working at the Magic Kingdom. She absolutely loves it! I made these for her and her friends. I'm sending them now so they can enjoy them before Halloween is over. Hmmmm Christmas pillow cases next?
Making these pillow cases were actually quite easy. Just google "pillow case pattern" and you will get many to choose from. There are also handy videos also if you are more of a visual person like me. Here are some pictures of the ones I made.


I love the orange and black fabric, here is a closer look of the detail...


See the skull and cross bones? It's neat how they put those in there. I have to honestly tell you I did not notice it when I bought it.  The next picture is of some cute ones that I think are so fun!


I have been working on a few other projects so I well post those when I get further along on them. In the meantime, have a great day!